Keeping Watch on Small Parts By Scott Rathburn
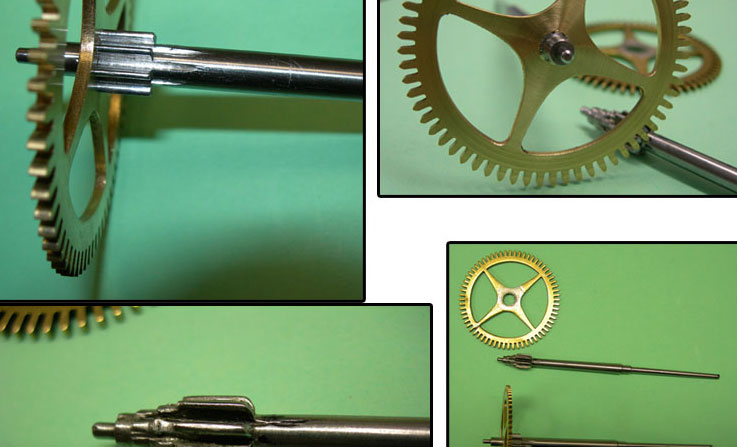
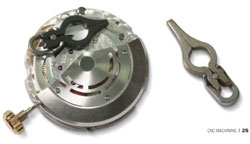
The average mechanical watch movement – say, from a Swiss Rolex automatic with date – contains around 135 individual parts. While some of those parts, such as the main plates, are relatively large (at least in watchmaking terms), the majority of them are quite small, often requiring magnifi cation to see clearly.
“The main plates are fairly big, but thin – from as thin as 1 mm to 5 mm,” explains Steve Cotton, owner of Micro Precision Parts Manufacturing Ltd. (MPPM), Qualicum Beach, B.C. “The small parts can be as small as 0.5 mm – too small to hold with your hands. You have to assemble them with fi ne tweezers and a 10-power loupe.”
Born in New Zealand in 1961, Cotton is a watchmaker by trade. He apprenticed for 4 years under his father, Peter Cotton, one of New Zealand’s top watchmakers, before passing fi nal exams at the New Zealand Horological Institute. After completing his apprenticeship, Cotton traveled to Neuchâtel, Switzerland, where he completed the Watchmakers of Switzerland Training and Education Program – “the most respected and highest-grade course in the world,” Cotton says. The young watchmaker rounded out his training with additional courses at ETA, SA (a primary supplier of high-end Swiss movements to the international watch industry) and Rolex, both in Switzerland.
The Island also proved home to a substantial population of clocks in need of restoration and repair – many requiring obsolete parts. It was the perfect opportunity for Cotton to return to his watchmaking roots. If he manufactured the obsolete parts himself, he reasoned, he could sell them for a profi t, and get the repair business. In 2004, he founded Micro Precision Parts Manufacturing to tap into the Island’s clock repair and restoration market.
Today, MPPM manufactures parts for and repairs high-quality vintage watches, high-end Swiss watches and vintage clocks. MPPM also has become a “go-to” company for micromachining parts for several other industries, including one of Canada’s leading robotics companies, and medical companies in the U.S. and Canada.
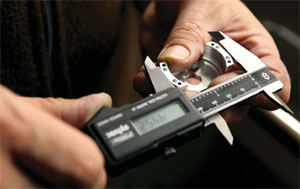
“The skill set of watchmaking is a very good match for micromachining,” Cotton points out. “If we are working outside of a 1- to 2-inch parameter, it’s a big part for us,” he says. Typically, parts are so small that 50 of them can be placed on a penny. But making small parts, Cotton explains, is not simply a case of dealing with smaller dimensions. All the elements of the machining system “have to work together.”
MPPM’s quiver of machine tools currently includes three machines from Haas Automation – two OM-2A Offi ce Mills and an OL-1 Offi ce Lathe – as well as a Sherline benchtop mill and lathe, which served as Cotton’s entrée into CNC. Cotton’s son, Matt, does the lion’s share of design work and toolpath generation with Mastercam®.
“Matt’s been doing most of the machining and the Mastercam programming for going on four years,” Cotton relates. “He wasn’t interested until he saw the fi rst mill make the fi rst part, and then I couldn’t keep him away. Once he saw what the machines could do, he was totally blown away.”
While MPPM handles some production orders, much of the shop’s work is single-digit runs of custom parts, and replacements for obsolete items. “Mass production for us is 10 units at a time,” says Cotton, “but we have bigger contracts starting to come through. Right now, we’re setting up one machine to run 300 units; that’s a good production run for us.”
In addition to watch and clock parts, the shop produces miniature gears and gearboxes for the robotics industry, lens-drive gears for cameras and a variety of other tiny, precise components. “We started out servicing old clocks and vintage watches,” Cotton says. “For half of them, you can’t get parts anymore, so I investigated CNC machining to make some of the obsolete parts.” The benchtop CNC mill and lathe served Cotton’s needs for about a year, but “even though it was automatic to a certain point,” he says, “it was still labor intensive.”
With world-class training under his belt, Cotton took time off from watchmaking to work with an international missions group, transporting teams of visiting missionaries to destinations throughout Europe. During this time, a young Canadian woman caught Cotton’s eye; they married in 1984 and returned to New Zealand. After a foray into automotive repair – complete with another apprenticeship – Cotton and family returned to his wife’s homeland in 1987, taking up residence in Edmonton, Alberta.
For the next 15 years, Cotton plied his trade as a watchmaker on two continents: working as a self-employed watch and clock repairman in Edmonton; establishing his own clock and watch shop in New Zealand; contracting with various jewelers and watch shops in Alberta; and fi nally, setting up the complete Rolex Service Center at Diamori Fine Jewelers in Edmonton. Cotton also continued his training during this time, taking courses at Rolex Geneva, Rolex Australia and Rolex Toronto.
In April 2002, however, Cotton’s life took an unexpected and near-disastrous turn, when his car was T-boned as he drove to work in Edmonton. “I suffered some minor brain damage,” he explains. “I had some memory loss, and lost my fi ne motor skills.” When much of your work takes place under a 10- to 20-power loupe, losing your fi ne motor skills is a life-changing event. “I had to set aside my watchmaking,” Cotton says, “which took some working through.”
Following the accident, Cotton accepted a position as sales manager for a software-development company on Vancouver Island. Although successful at the job – taking the company to an international level, and presenting its products to government offi cials in several countries – the work really didn’t suit Cotton.
What did suit him, however, was living on Vancouver Island. “We came for the weekend, and have stayed on the Island ever since,” he says. “It feels like I’m on the coast of New Zealand, but I’m still in Canada.”
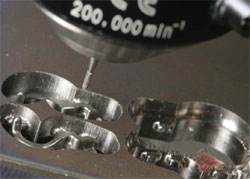
Looking to reduce tool-change time and labor, Cotton contacted the Haas Factory Outlet (a division of Thomas Skinner & Son Ltd.) in Richmond, B.C., about acquiring a CNC machine with an automatic tool changer. He settled on a Haas OM-2A Offi ce Mill, with 12″ x 10″ x 12″ travels, 30,000-rpm spindle and 20-pocket automatic tool changer. To cut effi ciently with tiny tools – some as small as 0.016″ diameter – Cotton also acquired a 200,000-rpm NSK pneumatic spindle to mount in the OM-2A’s standard spindle.
To further boost consistency, Cotton had a Renishaw® laser tool-setting probe installed on the OM-2A. “It sets every tool to the same standard,” he explains. “If you are hand-setting a tool, you can be a hundredth out on your height, diameter and width.” Cotton uses the tool probe to adjust offsets to minimize scrap as tools wear, and to assure that replacement tools cut identically. When grinding a ceramic part, he says, “we put 20 tools in the carousel, and tell the machine to run for one hour and then change the tool. The new tool has been ‘lasered’ as being exactly the correct size.”
Cotton was immediately pleased with the Haas machine. “Once we set up all the tools in the tool changer,” he says, “a gear that took me about 45 minutes on our benchtop machine dropped off the Haas every 8 minutes. But what I didn’t realize was that the scope of these machines is huge. The fi rst year, we were doing probably 80 percent clock work and 10 to 20 percent different machined parts. The second year, we went to 80 percent machining, and our watch side went to 10 to 20 percent – a huge change in one year.
“I found there was a real niche for the small micro parts,” Cotton continues. “Once people found out we could hold and machine such small stuff, we had everything from precision gears for ships’ autopilots, to tiny camera bodies, to small optical and medical parts, to ceramics for aneurysm clips.” The success of the fi rst Haas Offi ce Mill quickly led Cotton to purchase a second OM-2A, as well as a Haas OL-1 Offi ce Lathe for turning work. The OL-1 has a 5C collet spindle that spins to 6000 rpm, a full C axis and 8″ x 12″ (xz) travels. Like the Offi ce Mill, it easily fi ts through a 36″ doorway – which is a good thing, as the three machines are tucked tightly into the basement of Cotton’s Qualicum Beach home.
“The OL-1 is a perfect match for the mills,” explains Cotton. “We have it set up with axial and radial live tooling; having a machine that can turn parts and mill secondary features in one setup really completes our shop.”
MPPM machines parts from a variety of materials, including standard ferrous and nonferrous metals, as well as titanium and other exotic alloys, plastics and ceramics.
“We’ve cut medical-grade titanium, and a variety of ceramics, including alumina, silicon boron, cubic boron nitride and extremely hard silicon nitride,” notes Cotton.
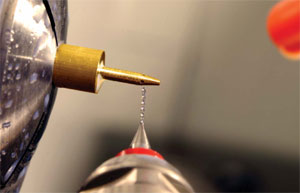
“Ceramics are ideal for medical applications,” he adds, “but they are diffi cult to machine, and expensive to manufacture. A part we can produce in titanium in 4 days takes 7 to 10 days in ceramic to achieve the same accuracy. Titanium and other materials are machined with carbide tools, but ceramics require diamond-impregnated grinding burrs. We tried a range of cutting tools – some PCD, CBN and cubic zirconia – and they couldn’t touch ceramic. It just blew them up,” he says.
Cotton’s foray into ceramic machining came courtesy of Concept Solutions Inc. (CSI), a Vancouver-based technology development company specializing in mechanical devices. “We were developing a highly advanced surgical implant – an aneurysm clip – that required ceramics,” explains CSI Technical Director James Klassen.
Klassen chose ceramic for the aneurysm clip for several reasons. Like titanium, it is biocompatible and non-magnetic, so it is readily accepted by the body, and unaffected by magnetic resonance imaging (MRI). Unlike titanium, however, ceramic is virtually invisible in an MRI image. “Conventional aneurysm clips are made completely of titanium,” says Klassen, “and they create a black cloud around the clip in the MRI called an artifact. The ceramic jaws are invisible in an MRI image, allowing the surgeon to see the clipped area immediately after surgery, and periodically for the rest of the patient’s life. This is a great benefi t to the surgeon, and the patient, because a small percentage of aneurysms are not completely clipped during surgery, and even when they are, some aneurysms will re-grow months or years later.”
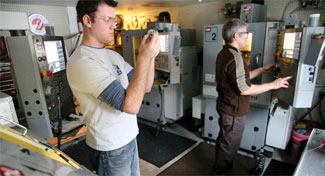
CSI’s ceramic aneurysm clips could advance surgical methods by an estimated 30 years, according to industry experts, but they posed serious machining challenges in the prototyping stage.
“The project had been declined by every shop we could locate that worked with ceramics, and we’d fi nally decided to buy our own CNC machine and do the machining ourselves.”
Klassen came across Cotton’s shop “by accident,” while researching equipment and tooling online. “I was searching the Internet for diamond burrs, and Steve’s shop came up, so I decided to give him a call,” he says. “He told us he didn’t know if he could do it, but he was willing to try.”
“I did some research,” says Cotton, “and knew how hard it [silicon nitride] was; it’s very hard stuff. I got some agate, which is just under the hardness of silicon nitride, and machined that, so I had an idea what I was in for.”
“Silicon nitride is nearly as hard as diamond,” explains Klassen. “There is no way to machine it with ‘normal’ cutting tools, but it can be ground using diamond tools. The small features on the aneurysm clip made it extra challenging, because we had to use very small tools, which required a high-speed spindle to achieve the necessary surface speed.
“We sat down with Steve to explain the project, and set up a test with one of their Haas Offi ce Mills to see if a 1 mm diamond burr could remove material from a silicon nitride ball bearing,” explains Klassen.
The test was a success, so with the machining process proven out, Cotton set to work on the fi rst set of prototypes.
The half-inch-long parts were machined from solid blanks of silicon nitride. They featured complex 3D contours with three contact surfaces, two of which specifi ed zero tolerance. “They had to be perfect,” Cotton states. The remaining tolerances were ±0.0004″.
Cotton used diamond-impregnated tools, including custom endmills as small as 0.016″ in diameter, with grit as fi ne as 800 (~25 microns) for fi nish passes. “With a drill or endmill that small,” he notes, “you really need to be up about 200,000 rpm.” The small-diameter tools require high rpm to produce suffi cient surface speed.
Cotton machined the ceramic parts on their Haas OM-2A, with the NSK air-driven supplementary spindle. “We use an M19 to orient the main spindle and hold it in position, and then we put in the NSK unit,” Cotton explains. “We push the spindle to its 200,000-rpm limit, and use a feedrate of probably 15-millimeters-per-minute for the roughing, and 10-millimeters-per-minute for the fi nish, with a stepover of two-hundredths of a millimeter (0.02 mm).”
Before machining the contours, Cotton ground the ceramic stock to a zero-tolerance surface on two sides. Those surfaces enabled him to clamp the part in a vise and establish datum points. Accuracy concerns led the customer to specify that the part be fl ipped in the vise to machine each side, rather than using a 4th axis, “which, for me, was hair-raising,” Cotton says. “They wanted us to datum the fl ip. It sometimes took 2 hours to dial it up.” Because large temperature changes would alter the setup dimensions, MPPM has a temperature-controlled atmosphere, and the machines are run up to operating temperature before machining the parts.
Such attention to detail pays off in the accuracy of the fi nished product. “The fi rst set of parts sent for testing were within 10 microns of the actual drawing specifi cations,” says Cotton. “We had a 20-micron tolerance, so they were pretty happy.” CMM inspection of a run of titanium springs – a critical part of the aneurysm clips – showed the shop “held a 5-micron tolerance on every part,” he says.
“We’ve now developed a process to machine the silicon nitride ceramics reasonably effi ciently for prototyping,” says Cotton. “We grind away the ceramic very accurately, leaving a really nice machined fi nish. The fi rst set of aneurysm clips took us nearly 4 weeks to make. But by experimenting with speeds, feeds, coolants and tool defl ection, we’ve narrowed that down to about a week.”
Cotton adds that issues such as tool wear and tool defl ection are much greater concerns when making such tight-tolerance parts. “We do some parts that are so small,” he says, “that you can hardly see them. They look like dust on your bench.”
A perfect example is a distal plug cup MPPM machined from Radel® (a high-performance thermoplastic) on one of their Haas Offi ce Mills for Caltech Pasadena. The part was 0.055″ long by 0.045″ diameter, with a 0.028″ diameter hole in one end and a 0.020″ slot in the other. “What was amazing to us,” says Cotton, “is that the accuracy of the Haas Offi ce Mill allowed us to interpolate a circle that small without any imperfection.”
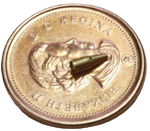
While ceramic parts require Cotton to use the auxiliary high-speed air spindle to obtain the proper surface speed for the minute tools, much of the shop’s watch and optical work employs the machines’ 30,000-rpm main spindle. But the work is no less challenging.
A recent bridge plate for a vintage watch illustrates the point. “It was 65-thou’ thick,” says Cotton, “and we had to drill a 25-thou’ hole through the side of the fl at plate, right through the bridge. We’re into that kind of part probably once a month. I did one the other day in stainless steel; it was a little plate to mount optical parts. It was about 4 millimeters thick, with 10 different holes. The spindle speed was 28,000 rpm, and it was probably 10 pecks. The drill was 12 thou’, and I was freaking out,” says Cotton. “This big machine with this drill you can hardly see, and the Haas came down and perfectly pecked every hole, didn’t break a bit, perfectly cleared the chip. When you see that kind of precision, it’s almost like a dream to watch it.”
MPPM’s OL-1 Offi ce Lathe gets a similar workout. The smallest part they’ve machined is a miniscule air-pressure nozzle for CalTech Pasadena. Machined from brass, “the widest part of the nozzle is 65 thou‘,” explains Cotton, “and there’s a 14-degree taper on the front of the nozzle. At 90 degrees to the 14 degree taper, we had to pop four 12-thou’ holes, 90 degrees apart. We did that with a 30,000-rpm radial air spindle. Then we reversed the part and bored the internal diameter,” Cotton continues. “The internal diameter is 60 thou’, which leaves a 5-thou’ wall. Then it steps down to 18 thou’, and the next step is 12 thou’; it’s stepped all the way through. When you look at it under a microscope, it’s pretty incredible that you can machine it.”
But incredible is the name of the game for MPPM. “We have special holding tools that we use for watchmaking,” Cotton says, “and we go in under 10 to 20 power and debur the parts by hand. When we get a part with a tolerance that is 2 to 3 thousandths,” he concludes, “we just love it, because it is so simple by comparison.”
From an article on www.HaasCNC.com .

